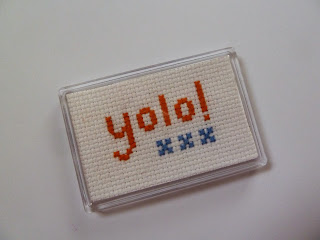
Skill Level: I'll walk you through it.
Time Taken: An hour of watching you boyfriend play Valhalla and the Fortress of Eve
Materials:
- About 15cm square of 14 Count Aida
- Two colours of stranded cotton. I've used Anchor colours 131 (blue) and 687 (orange) I suggest going for whatever colours you want.
- A rectangular fridge magnet frame: 70mm by 45 mm
- White paper
- Tapestry needle
- Scissors
- The chart: you can download the PDF here.
3...2...1...Go!
First cut a length of thread about the length of your forearm. You'll have six strands. Pull it apart and take three strands. Thread your three strands onto the needle.
To start off make a knot in your thread. Go to the edge and pull the needle through the fabric from front to back. We're going to start working in the centre and as we make our stitches the thread will be caught under them so later we can cut the knot away.
So we'll start in the middle of our fabric and the middle of our patten. That brings is to the bottom of the first 'o' Bring the needle up from back to front find the point on the square diagonally opposite and draw the needle through to the back. That's the first part of the cross.
Pull the tread all the way through. Now we have to go the other way.
Go back to the bottom of the square and pull the needle from back to front. Cross over the stitch you just made bringing your needle down into the diagonally opposite corner.
Carry on making the stitches as indicated in the chart. There is a second way of making stitches and I like to use them both as I go through a pattern depending on what seems easiest.
Here's how to do it. When you've made the first leg of you... don't make the second leg, make the first leg on the next stitch instead.
When you've done the first legs of all the stitches you want you can make all of the second legs.
And you've got all your stitches done. Cool.
At some point you're going to come to the end of your thread and need to start another. Instead of tying a knot the easiest thing to do is pass the thread under the stitches on the back side. You'll have to be careful not to pull to hard on the first couple of stitches but it's a way to start and finish without leaving a knot. A knot will leave a bump on the front of your fabric. If you don't mind bumps feel free to knot.
Okay so you've done all your stitches? Cool! First give your ends a trim, get rid of that knot you made at the start.
Then we want to cut down our fabric to fit in the frame along with that piece of paper I mentioned right at the start and haven't talked about since. Assemble it all and you are done.


No comments:
Post a Comment